


First, I had to decide what size to make my blocks. For fun, my blocks will all be the same height but vary in width. I cut my fabrics 12 inches high and "whatever" width, layering two fabrics when I cut.

Next step was to make two cuts across the "middleish" of the block, making the cross bar. No measuring allowed. Just eyeball where you want the cross on the block.

Seperate the top and bottom from the middle section and eyeball two cuts on each to create the vertical cross bar.
Note: I did not cut through the middle cross section. So, there are now 7 patches to this block. Because there are two layers of fabric, I have cut two blocks at once. Now, for the magic:


Now, sew the bottom sections together in the same way, being careful to keep the parts in the correct postitions. The pin markers help to do that.

Pin the upper and lower sections to the cross bar, centering them and sewing together. I pressed all the seams open when making this block, by the way. Note: The upper and lower secions will be shorter than the middle cross bar. Doesn't matter. Just sew them together. No matching needed, really, for this liberated look we are going for.

You are almost done...............now just trim the blocks to the desired size. I decided to trim my blocks all to 10.5 inches high and various widths. This will make it easier to assemble the quilt in the end.

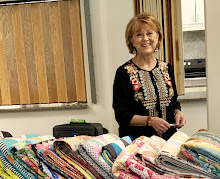
Here are my finished blocks! I am pleased with the way they turned out. Each cross will be a little bit wonky for an interesting quilt. I had to force myself to quit sewing. These were so much fun to make. I don't know how many I need really. Surely I'll get tired of making them sometime!
Thanks, Joan, for inviting me to join in your quilt along....I'm lovin' it!
And now, for the news you've all been waiting for: The winner of the Boxer Give Away!
The winner is Jennifer from That Girl......That Quilt. I'll send you an email and get your address so I can get the dog.........er, I mean undies and charm pack in the mail. Congratulations! Jennifer, who'se loving grey, yellow and purple color combo right now, is wanting some boxers to replace the ones her husband took over after her own trip to Target for some Liberty of London love! Thanks, everyone for the nice comments and messages. A special thanks to those of you who became a follower. You're awesome!
Piecefully,
Carla


Oh, Carla -- I love, love, LOVE what you are doing here! You have truly liberated your cross blocks. The solids are perfect (I have started cutting some solids and am hoping they will go well with my prints), and I love how you are varying the width of the blocks and have changed them from none-patch to seven-patch! You have truly made these your own! I am so pleased to have been even a tiny part of this!
ReplyDeleteAnd congratulations to Jennifer! Woo Hoo!
Love it, Carla! Love your colors, love your method! I'm using a different approach because I'm trying to conserve these fat quarters I'm crying over. Maybe I'll do a little process documentation in the next couple of days. Isn't it FUN!?!?! Yes, the answer is yes!
ReplyDeleteYour blocks are just wonderful! I can't wait to get started on mine...
ReplyDeleteThank you, thank you, thank you for the boxers! I'm so excited to have won and I'm happy to have found your blog too.
Jennifer :)
how come i lOVE this soooo much... oh that's right... cause it's fabulous!!! the solids together... f a n t a s t i c !! ;)
ReplyDeleteEeeep! Just what I've been looking for. I just could not wrap my head around this. Thank you!
ReplyDeleteI love this idea! Do you think it'd be too busy to try prints instead of solids??
ReplyDeleteLinda in OK
http://quiltcookies.blogspot.com
Thank you for the tutorial.
ReplyDeleteAnd I'm your new follower.
Best regards
Jo&cats
i made a quilt using your technique!
ReplyDeletehttp://www.flickr.com/photos/57599878@N08/5299620862/
Thanks so much!
I love this quilt block and plan to whip up a quick wall hanging for my father-in-law for his seminary graduation gift. Hopefully, I can put one together in a week...Will link to this tutorial when I post it! Thanks!!
ReplyDeleteI finished it, in time even! You can check it out on my blog:
ReplyDeletehttp://sidestitches.blogspot.com/2011/05/modern-cross-quilt.html
Thanks so much for this wonderful tutorial!
Thanks again for this awesome tutorial. I finished my quilt!
ReplyDeletehttp://r0ssie.blogspot.com/2011/05/bound.html